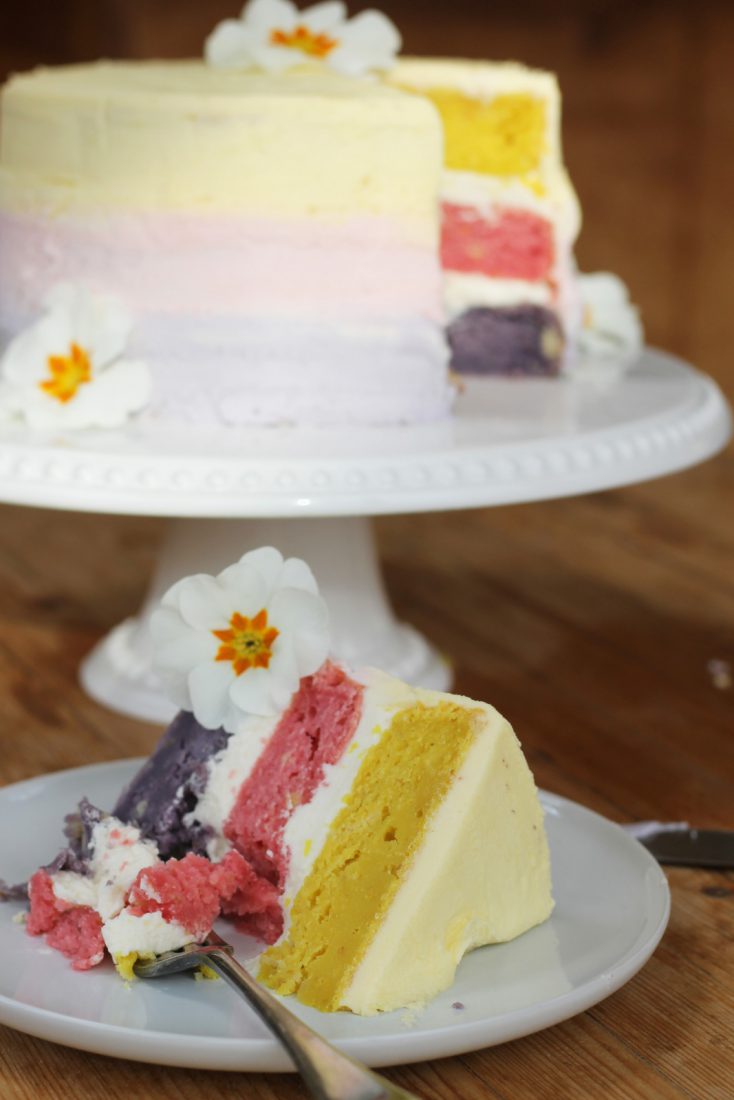
Vegan Easter Rainbow Cake
This is a real crowd pleaser at Easter and lots of fun to make! The cake itself is a yoghurt based sponge which is denser than some sponges and really delicious. Choose your colours and get creative 🙂
Share your creations with us by using #veganrecipeclub and tagging @veganrecipeclub
Total time
60
Cuisine
United States and Canada
Meal
- vegan-desserts
Servings
12-16 servings
Ingredients
Cake
- 350g vegan margarine
- 350g caster sugar
- 660g white SR flour
- 8 tsp baking powder
- Pinch salt
- 660g plain vegan yoghurt
- 2 tbsp flax meal (see above) mixed with 6 tbsp warm water
- zest of 2 lemons plus juice
- 2 tsp lemon essence (optional)
- A little plant milk (eg rice, soya) if batter too thick
- 3 different food colourings of your choice (ideally gel colours)
Icing
- 100g vegan margarine
- 100g vegetable shortening (eg Trex… found in most supermarkets)
- 1kg icing sugar
- 2 tsp vanilla essence
- 3 food colourings (the same colours as used in the main cake)
Instructions
Cake
- Preheat the oven to 180°C/350°F/Gas Mark 4 (NB. Reduce this if using a fan-assisted oven). Now grease three 18cm/7 inch cake tins and line their bases with greaseproof paper – use the round base to draw a circle out on the greaseproof then cut out with scissors.
- In a small saucepan, melt the margarine on a very low heat.
- Sieve the flour and baking powder into a bowl and add salt. Pour the melted margarine, sugar, yoghurt, flax egg and lemon essence to the flour mix. Mix well until you get a soft dropping consistency. Add the lemon zest plus as much of the lemon juice as you can without making the batter too runny. If it needs more liquid, add a splash of plant milk, eg soya, rice, coconut or oat.
- Weigh the cake mixture and then divide it into three equal parts.
- Put a small amount of each of the different food colourings individually into each part of the mixture until you get your desired colour. The colour will generally stay the same throughout baking so you get a good indication of the final colour at this stage.
- Spoon the cake mix into the three tins and bake for 25-30 minutes or until risen and golden. Test by inserting a sharp knife or toothpick into the centre of each cake. If it comes out clean, the cake is cooked. If not, return to the oven for another 5-7 minutes. Let the cakes cool completely before removing them from their tins. Carefully place them upside down on a heat rack until completely cooled.
Butter Icing
- Whisk together the margarine, vegetable shortening and vanilla either by hand or electric whisk.
- Add the icing sugar, a quarter at a time, along with the plant milk until combined.
- You can add more icing sugar or plant milk if the icing gets too wet or too dry.
- You will need to trim the cakes, using a sharp knife, so that they are flat on both sides.
- Place one section of the cake onto a cake turntable (ideally) or alternatively a cake stand. Spread a layer of the plain butter icing onto the top of the first layer then place the second layer over the top.
- Spread another layer of the icing onto the next section of the cake and then place the final section of the cake on top of this one.
- Now divide the remaining butter icing into three parts but one part will need to be double the amount of the other two parts (as you will be using this part of the icing to ice the side and top section of the cake).
- Add a food colouring to each divided section of the icing. Do it a little bit at a time to achieve your desired colour.
- Using a palette knife, spread the first colour onto the bottom of the cake, roughly covering a third of the side of the cake from the bottom up. Don’t worry about smoothing it down at this stage.
- Get the next coloured icing and spread this roughly onto the middle third of the cake. Again, don’t worry about smoothing it down at this stage.
- Get the final colour which will be used on the top third and over the very top of the cake. Spread it roughly onto the top third around the side of the cake and then cover the top.
- Using an icing smoother, place it vertically along the side of the cake and then turn the cake turntable to smooth and blend the icing and take off the excess. Do the same on the top of the cake although you might need to do the edges using more icing. Repeat the process until desired effect achieved.
Keywords
Did you know that the Vegan Recipe Club is run by Viva!, and that we are a charity?
We create vital resources to help educate everyone – vegan veterans, novices and the v-curious alike – about vegan food, health and nutrition; as well as the plight of farmed animals and the devastating environmental impact of farming.
Through this work we have helped thousands of people discover veganism; but we want to reach millions more! We rely entirely on donations as we don’t get any government funding. If you already support us, thank you from the bottom of our hearts, you are really making a difference! Please share our details with your friends and loved ones too, as every donation enables us to keep fighting for change.
